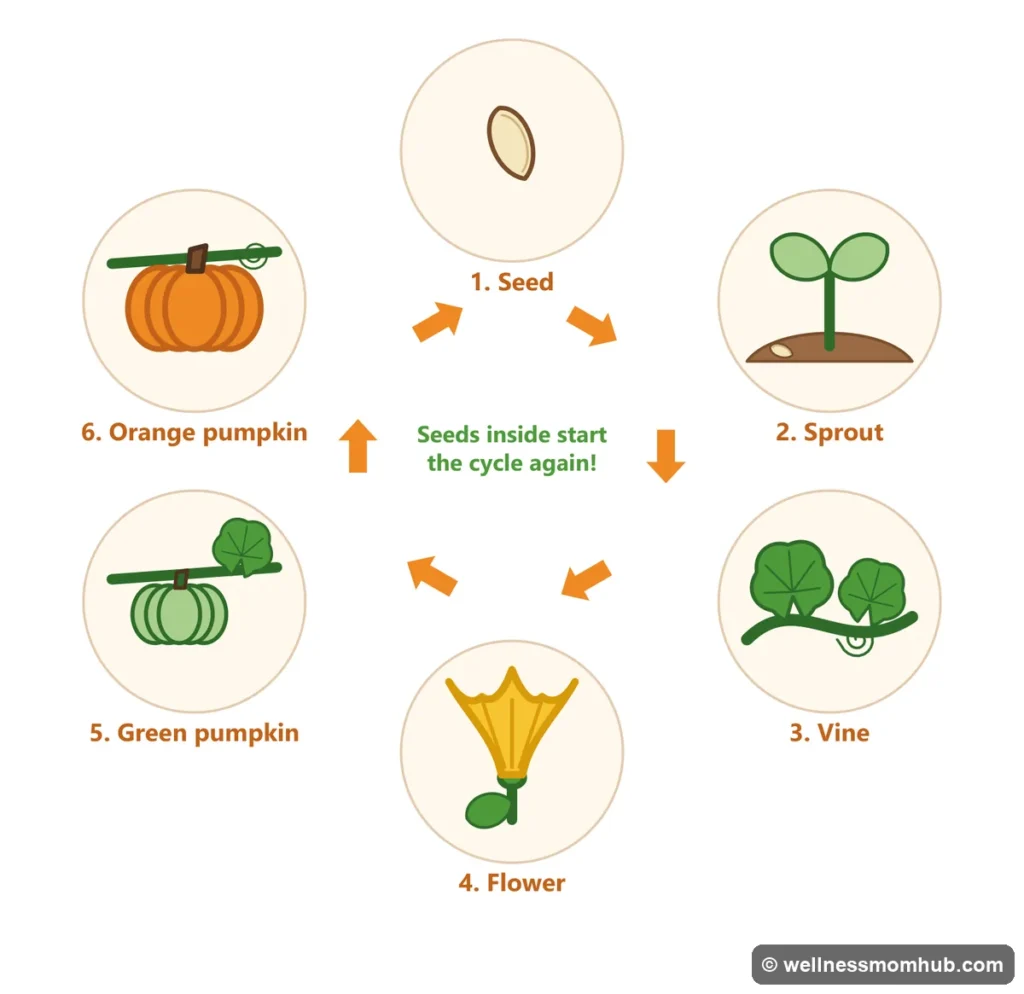
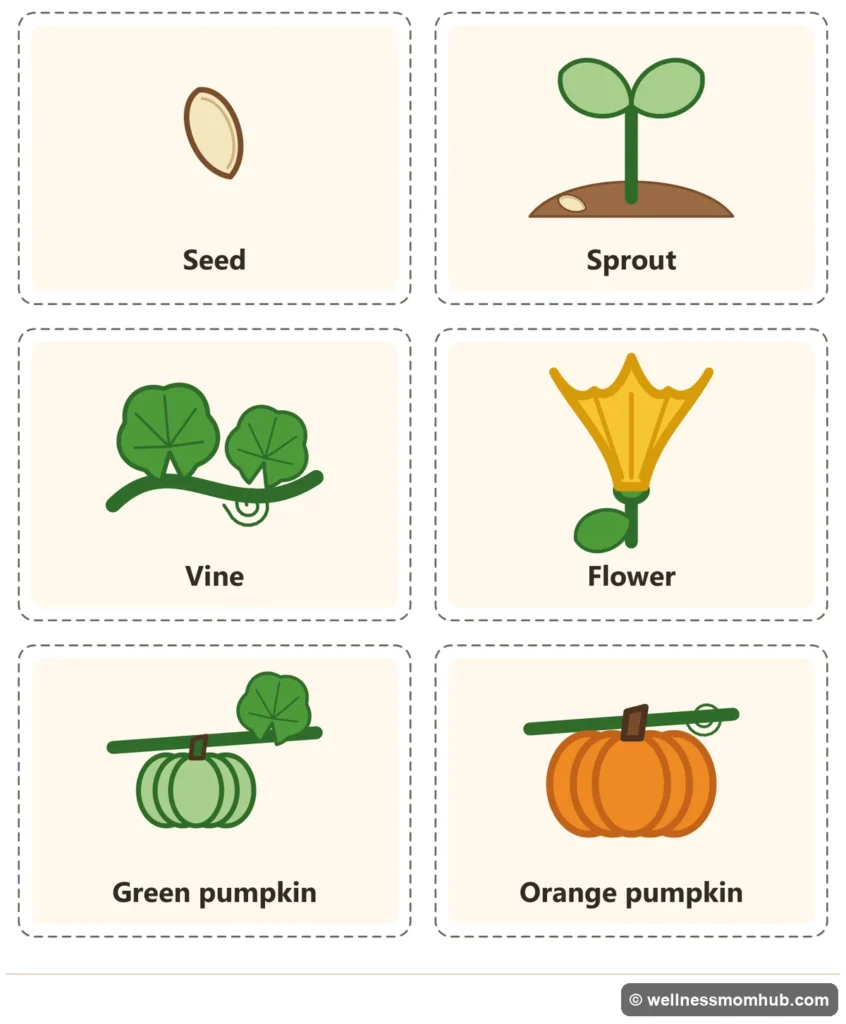
The pumpkin life cycle has six stages: seed, sprout, vine, flower, green pumpkin, and orange pumpkin. A seed planted in warm soil sprouts in about a week, grows into a long vine, makes yellow flowers that bees pollinate, and turns into a pumpkin that ripens from green to orange. The seeds inside start the cycle again.
Quick answer: most pumpkins take more than 100 days to grow from seed to ripe pumpkin. Use the free pumpkin life cycle printable below (8 pages, no email) for a poster, sequencing cards, a cut-and-paste wheel, a parts of a pumpkin diagram, an investigation sheet, and seed counting with ten frames.
Free printable Pumpkin Life Cycle Printable
 Save
The 6 stages of the pumpkin life cycle
| Stage | What happens | Say it to a preschooler |
|---|---|---|
| 1. Seed | A flat, oval seed is planted about half an inch deep in warm soil. | “The seed is sleeping in the dirt.” |
| 2. Sprout | A root grows down, a shoot pushes up, and two round seed leaves open. | “It woke up and poked out!” |
| 3. Vine | The plant grows a long, creeping vine with big leaves and curly tendrils. | “It’s growing a long arm along the ground.” |
| 4. Flower | Yellow flowers open. Bees carry pollen from male flowers to female flowers. | “Bees help the flower make a pumpkin.” |
| 5. Green pumpkin | A tiny pumpkin under the female flower swells and stays green at first. | “A baby pumpkin is growing.” |
| 6. Orange pumpkin | The pumpkin ripens, turns orange, and fills with seeds. | “It’s ready, and the seeds can grow new pumpkins.” |
1. Seed
Every pumpkin starts as a seed, the same flat, cream-colored seeds kids scoop out of a pumpkin in October. Gardeners plant them about half an inch deep once the soil is warm and there is no more frost, because pumpkins are a warm-weather plant.
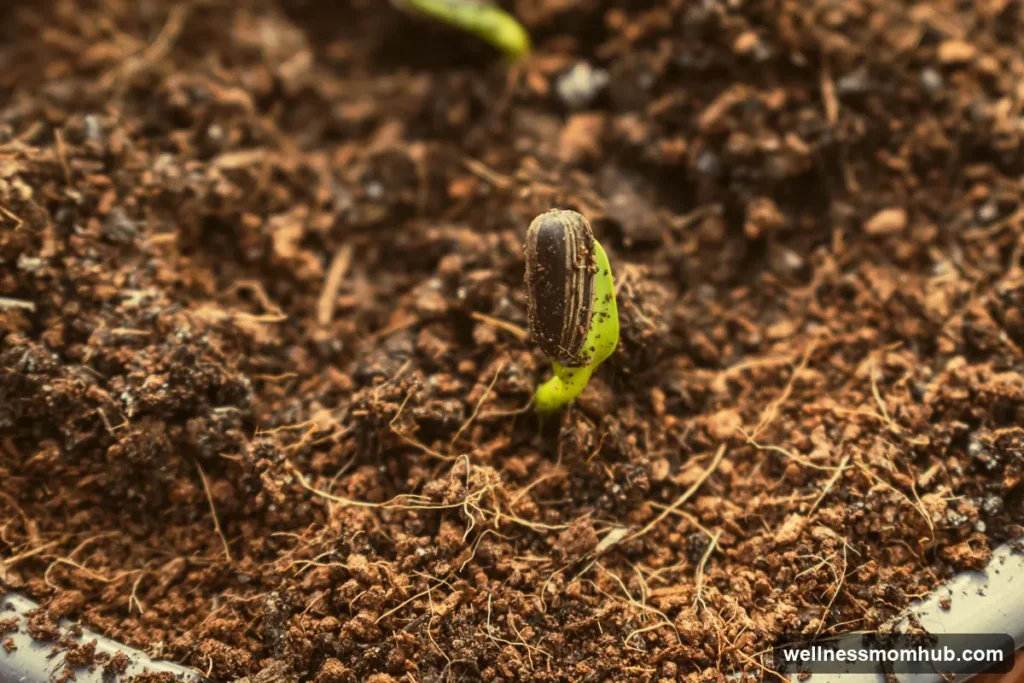
2. Sprout
 Save
With water and warmth, the seed germinates. That means a tiny root grows down into the soil and a shoot pushes up toward the light. The University of Maryland Extension says to expect germination in 7 to 10 days. The first two leaves are smooth and round. These are seed leaves, and they look nothing like a pumpkin leaf yet.
3. Vine
Next the plant grows true leaves: big, rough, and lobed. The stem stretches into a long vine that creeps along the ground, and thin, curly tendrils wrap around anything they touch to hold the vine in place. A healthy pumpkin plant needs lots of sun and plenty of room to spread.
4. Flower
 Save
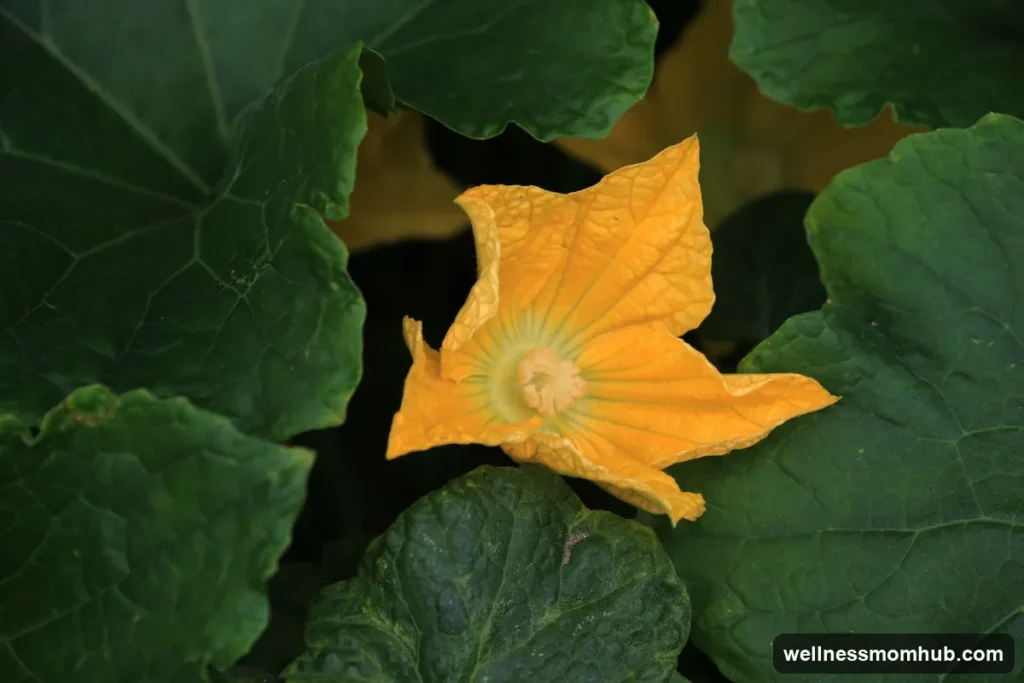
Bright yellow, trumpet-shaped flowers open on the vine. Pumpkins have two kinds of flowers. The male flowers come first, usually for one to two weeks before any female flowers appear. A female flower has a tiny, round bump underneath it: a baby pumpkin. For that bump to grow, bees have to carry pollen from a male flower to a female flower. Kids love finding the “baby pumpkin” under a female flower if you can visit a garden or farm in summer.
5. Green pumpkin
Once the female flower is pollinated, the petals wilt and fall off and the little pumpkin starts to grow. Young pumpkins are green, and they keep growing bigger on the vine for weeks.
6. Orange pumpkin
As it ripens, most pumpkins change from green to orange and the skin gets hard. Inside are lots of seeds. Plant one of those seeds next spring, and the pumpkin life cycle starts again.
How long does it take a pumpkin to grow?
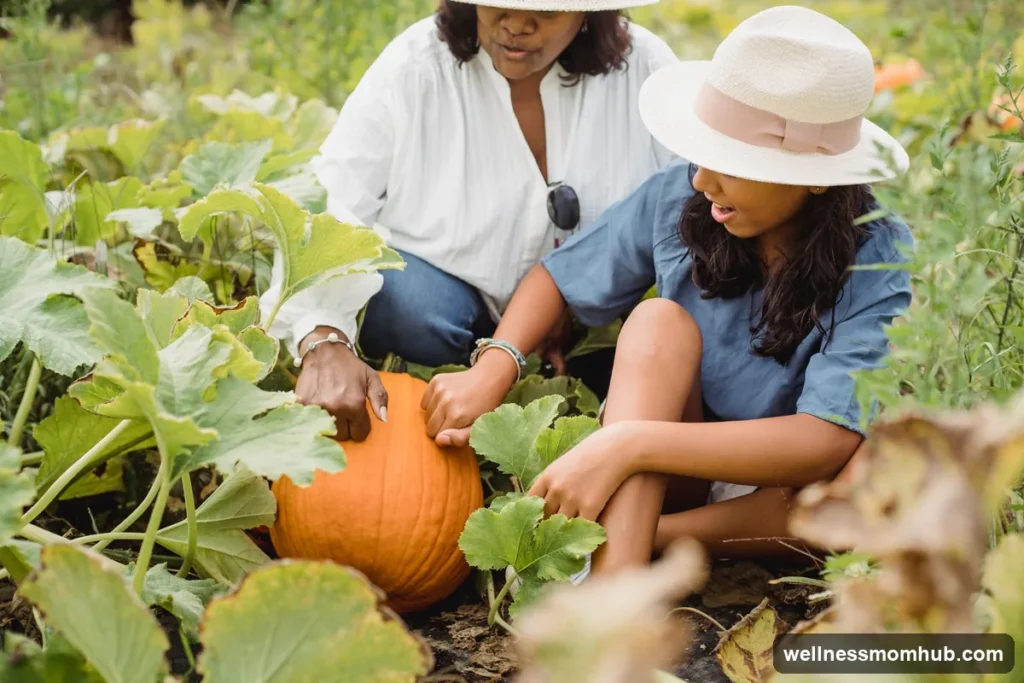
Most pumpkins need more than 100 days from seed to ripe pumpkin, according to the University of Maryland Extension. That is why pumpkins planted in late spring or early summer are ready to pick in September and October.
 Save
| Milestone | About when |
|---|---|
| Seed planted | After frost, in warm soil (late spring or early summer) |
| Sprout appears | 7 to 10 days after planting |
| Male flowers open | Several weeks later, once the vine is long |
| Female flowers open | 1 to 2 weeks after the first male flowers |
| Ripe orange pumpkin | More than 100 days after planting, usually in September or October |
Exact timing depends on the pumpkin variety and the weather. Rainy weeks keep bees at home, and fewer bee visits mean fewer pumpkins.
Parts of a pumpkin
 Save
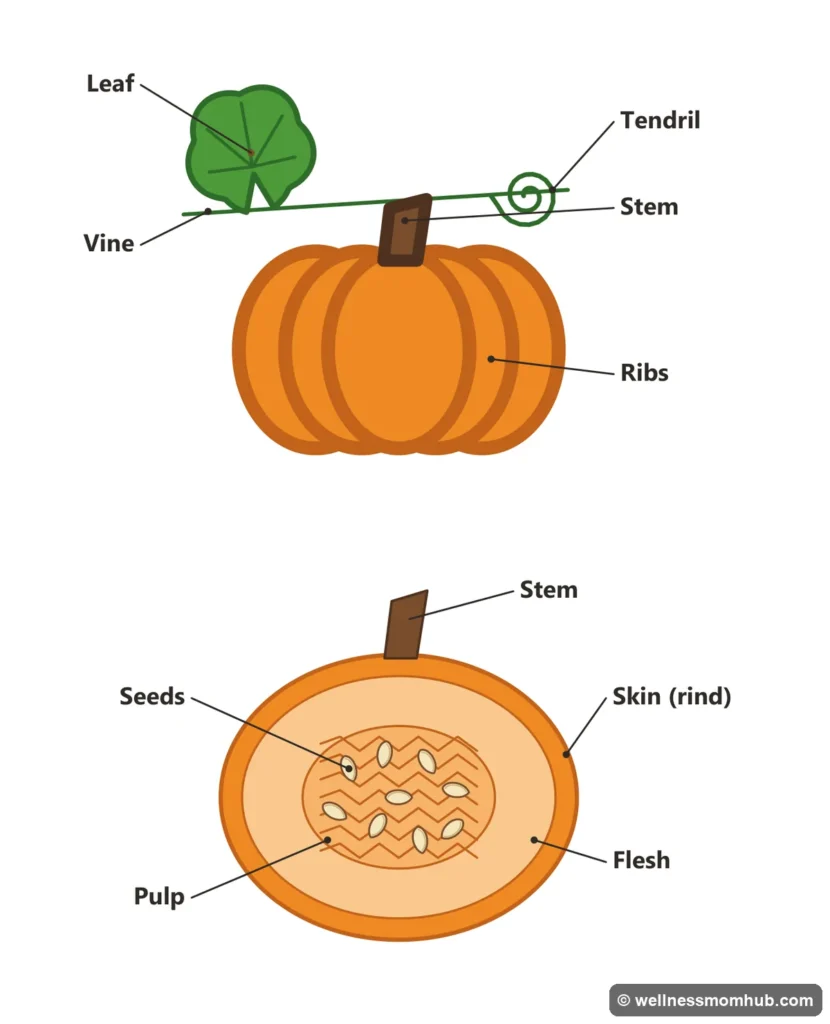
Pair the life cycle with the parts of a pumpkin. It helps kids connect the vine they see in pictures with the pumpkin on the table. On the outside and on the plant:
- Vine: the long, creeping stem the whole plant grows on.
- Leaf: big and rough. Leaves catch sunlight to make food for the plant.
- Tendril: a thin, curly string that wraps around things to hold the vine in place.
- Stem: the woody handle on top that connected the pumpkin to the vine.
- Ribs: the lines that run from top to bottom on the outside.
On the inside, once a grown-up cuts it open:
- Skin (rind): the hard outer layer.
- Flesh: the thick, firm layer under the skin. This is the part used for pumpkin pie.
- Pulp: the slimy, stringy middle that holds the seeds.
- Seeds: the start of the next life cycle.
Pumpkin life cycle activities by age
| Age | Try this | What they practice |
|---|---|---|
| 2–3 | Look at the poster together, name each stage, color the cards. A grown-up cuts. | New words, looking closely |
| 3–4 | Put the six cards in order, glue them on the life cycle wheel, feel the outside of a real pumpkin. | Sequencing, describing changes |
| 4–6 | Label the parts, fill in the investigation sheet, count seeds into ten frames. | Early science and math, writing words |
10 hands-on pumpkin life cycle activities
- Sequencing cards. Cut out the six cards from page 3, mix them up, and have your child put them in order. Ask, “What comes after the flower?”
- Life cycle wheel. Glue the six small pictures from page 4 into the numbered boxes on the circle. The circle shape shows that the cycle never ends.
- Act it out. Curl up small like a seed, slowly “sprout” up, stretch your arms into a vine, open your hands like a flower, and puff up into a big round pumpkin.
- Explore a real pumpkin. Feel the ribs and the stem, smell it, tap it, and guess what’s inside before a grown-up cuts it open.
- Sink or float. Guess, then put a small pumpkin in a tub of water. Most pumpkins float because they are hollow inside. Write the result on page 7.
- Measure it with yarn. Wrap a piece of yarn around the middle, cut it, and compare it with your child’s height or a friend’s pumpkin.
- Count the seeds. Rinse a handful of seeds and count them into the ten frames on page 8. Grown-ups keep the seeds at the table (see the safety notes below).
- Label the parts. Use the word bank on page 6 to label the stem, skin, flesh, pulp, and seeds. Younger kids can point while you write.
- Plant a seed in a cup. Plant a dried pumpkin seed about half an inch deep in a cup of potting soil, keep it warm and damp, and watch for the sprout. Mark the day it pops up on a calendar.
- Watch a pumpkin change. After Halloween, set an old pumpkin outside and take a photo each week. Kids can see it soften and break down, and some of its seeds may even sprout next spring.
 Save
Pumpkin math for preschoolers
Pumpkins are great for early math because kids can touch what they count. Try these with the printable or a real pumpkin:
- Estimate, then count: guess how many seeds are inside, then count into groups of ten.
- Bigger and smaller: line up three pumpkins or gourds from smallest to biggest.
- How tall? Stack blocks next to the pumpkin and count how many blocks tall it is.
- Heavier or lighter: hold a small pumpkin in one hand and an apple in the other and decide which is heavier.
- Count the ribs: run a finger down each rib line and count them.
For more counting and pre-writing practice, see our preschool activities at home and fine motor activities for toddlers.
Safety notes
- Grown-ups do all the cutting. Kids can scoop the pulp with a spoon once the pumpkin is open.
- Seeds are a choking hazard for little kids. The American Academy of Pediatrics lists nuts and seeds among the foods to keep from children under 4. Count and plant seeds at the table with an adult watching, and put them away afterward.
- Wash hands after handling pulp, soil, and seeds.
Free pumpkin life cycle printable
 Save
The free pumpkin life cycle printable is 8 pages, US Letter, with no email sign-up:
- How to use it by age, with safety notes
- Life cycle poster with all six stages
- Six sequencing cards
- Cut-and-paste life cycle wheel
- Parts of a pumpkin, labeled
- Label the parts yourself, with a word bank
- Pumpkin investigation sheet
- Seed counting with ten frames
Print with “Fit to page” turned on. The poster looks best in color, and every other page also works in black and white. Cardstock makes the cards last longer.
More pumpkin and fall fun: free pumpkin outline templates, no-carve pumpkin painting ideas, and fall activities for toddlers.
Pumpkin life cycle FAQ
What are the stages of the pumpkin life cycle?
Seed, sprout, vine, flower, green pumpkin, and orange pumpkin. The seeds inside the ripe pumpkin can be planted to start the cycle again.
How long does it take for a pumpkin to grow?
Most pumpkins take more than 100 days from planting to a ripe pumpkin. The seed usually sprouts in 7 to 10 days, and the pumpkin is ready to pick in early fall.
Do pumpkins start out green?
Yes. Young pumpkins are green, and most varieties turn orange as they ripen. Some varieties stay white, yellow, or green when they are ripe.
Why do pumpkins need bees?
Pumpkins have male and female flowers. Bees carry pollen from the male flowers to the female flowers, and only a pollinated female flower can grow into a pumpkin.
What are the parts of a pumpkin?
On the outside: stem, skin (rind), and ribs, plus the vine, leaves, and tendrils on the plant. On the inside: flesh, pulp, and seeds.
What age is the pumpkin life cycle good for?
Toddlers can name the stages and color the cards, 3- and 4-year-olds can sequence them, and kindergarteners can label the parts, measure, and count seeds.